

Set Up Your AI Workspace (MacOS)
Chatbot versus Agent
Chatting with AI in the browser is quick, but when you need to change projects on disk, batch-edit files, and keep the assistant aligned with what is in the current folder, you want a local-folder-first workflow: files live on disk, and the editor’s assistant reads and writes them by path instead of endless copy-paste.
Web AI versus a Local AI Workspace: What’s the Difference?
AspectWeb chat AILocal workspace (Visual Studio Code + agent)Reading your projectUsually manual copy-paste or repeated uploadsOpen the folder; the agent reads/writes by pathBatch editsHard to change a whole tree reliably and reviewablySuited to multi-file refactors, renames, scaffolding**‘Project memory’Context often breaks when the session endsThe workspace is the boundary; instructions align with the treeRepeatable flowsDepends on you re-describing the environment each timeTerminal, Git, and extensions can be scripted and sharedLearning curve**LowSlightly higher, but pays off once set up
Visual Studio Code is a common entry point for this kind of workspace. After you install a coding-assistant extension, you can edit files and work with the assistant in one window and keep day-to-day writing and collaboration in one place.
What is Visual Studio Code? Why Visual Studio Code?
Visual Studio Code is a workspace for viewing, editing, and managing files on your computer, not where the files are actually stored. Think of the computer as a room: files sit in a filing cabinet. Visual Studio Code is more like a desk; when you open it, you lay out the files you need and work on them there. Edits, saves, and deletes on the desk change the originals in the cabinet.
From that angle, Visual Studio Code bundles browsing, search, and editing so you hop between apps less. Extensions add capabilities, for example, the Claude coding assistant can run inside Visual Studio Code so coding and AI-assisted edits stay in one environment.
Part 1: Install Visual Studio Code
Install Visual Studio Code
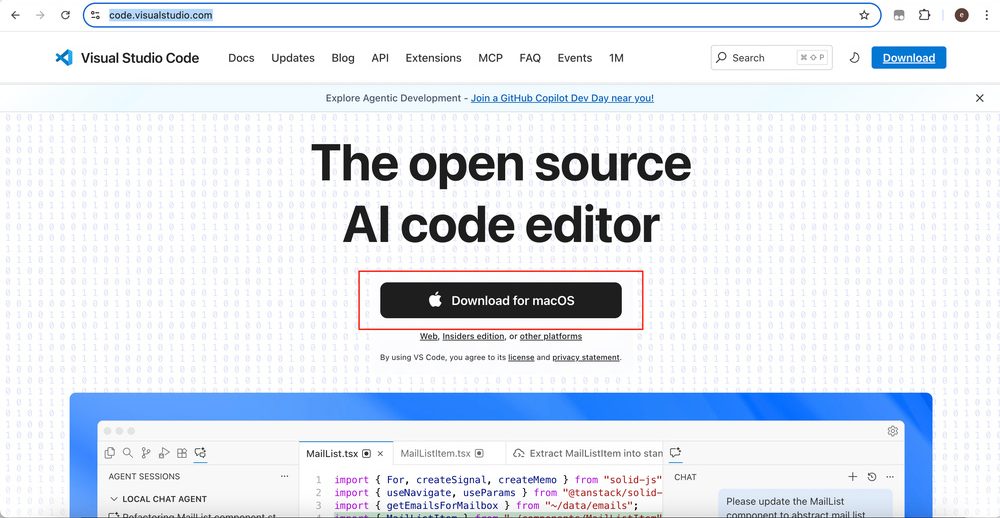
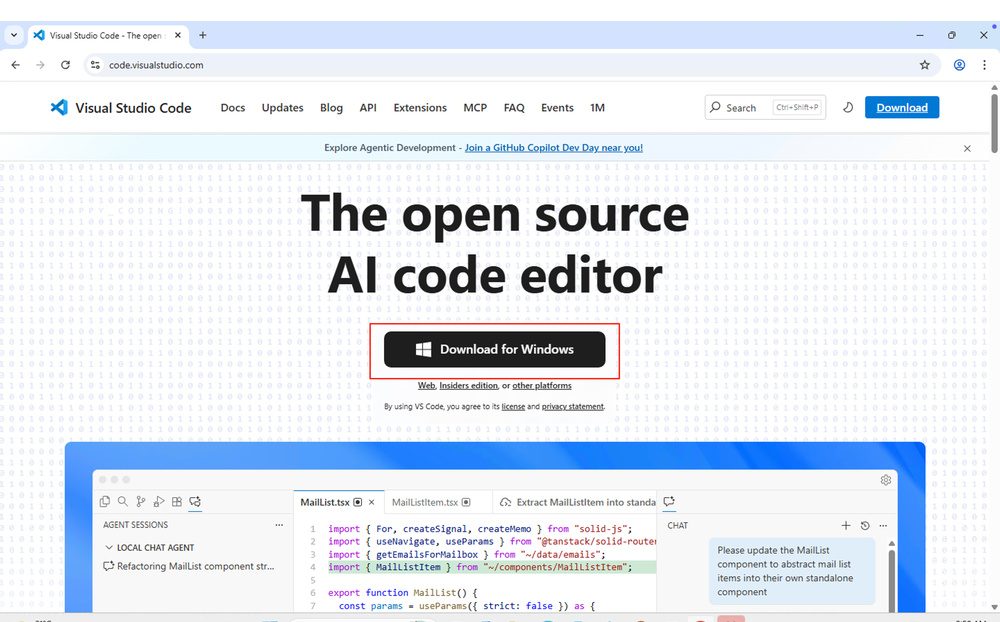
Open the Visual Studio Code site https://code.visualstudio.com/ and download the installer.
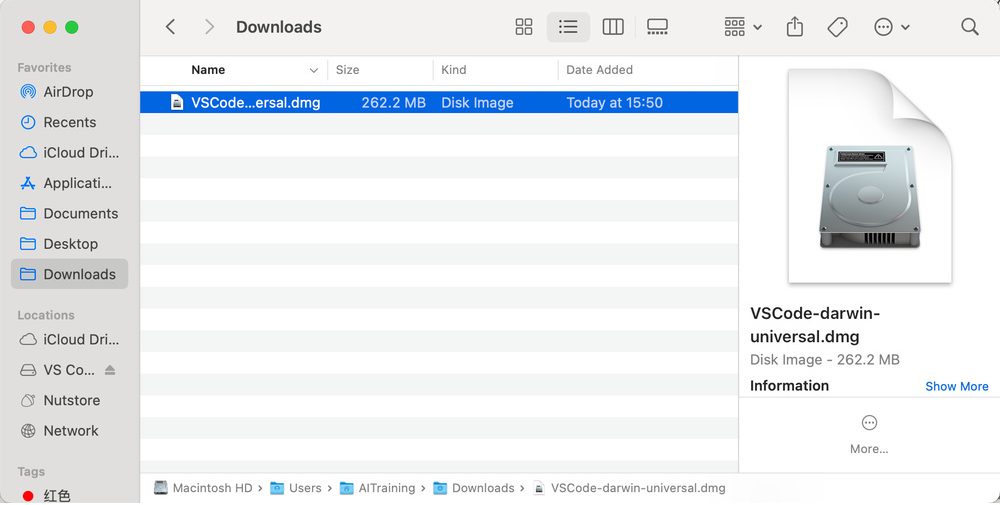
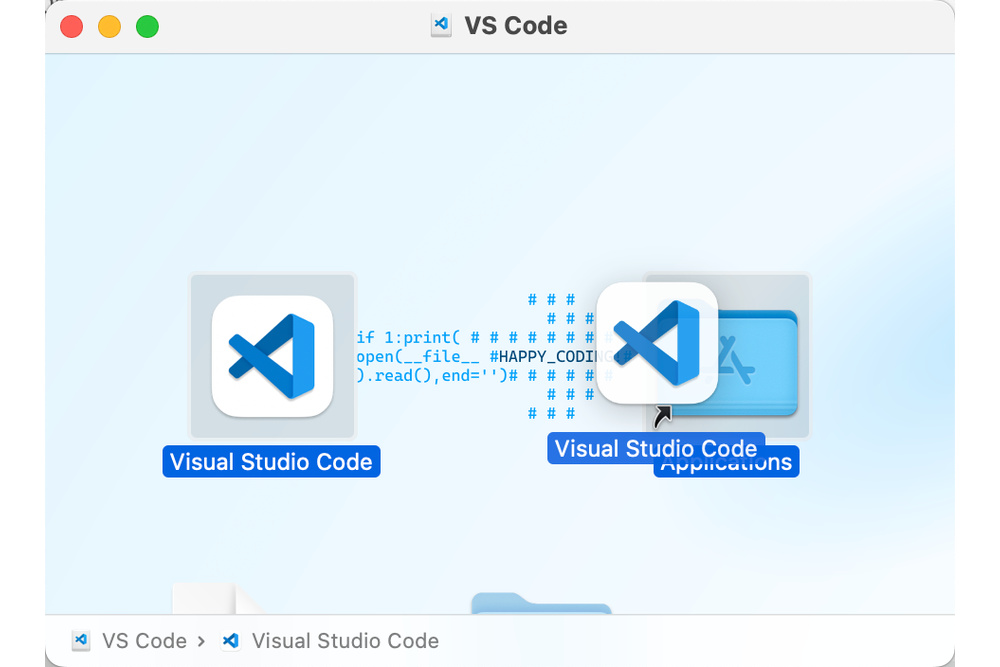
Double-click the installer and follow the wizard.
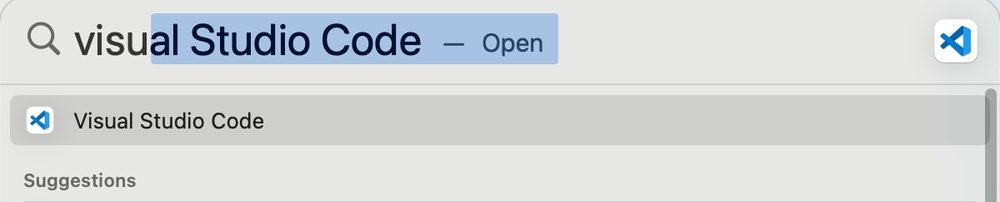
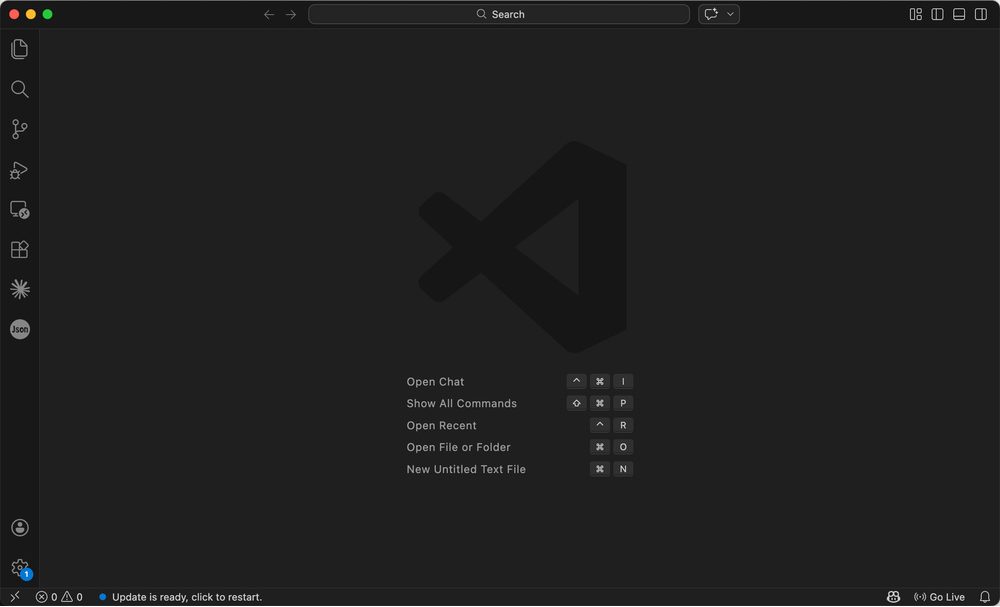
When installation finishes, open Visual Studio Code from Spotlight.
Part 2: Manage Your Workspace on Disk
Basic File Habits
Many beginners struggle not with menus but with messy trees, forgotten paths, and mixing different projects. A few habits prevent most of that.
Carve out a dedicated work area, for example a top folder called Workspace with two children: global rules versus concrete projects. Use system for conventions every project should follow (style guides, task workflows), a long-lived “briefing” for your assistant. Use project for separate tasks, each in its own subfolder, with notes or config as needed. The tree might look like this; names are up to you as long as the layout is obvious.
Workspace/ ├── system/ ├── project/ │ ├── subproject1/ │ ├── subproject2/ │ └── subproject3/
Stick to one folder per project so unrelated tasks do not share a directory level (search and cleanup get expensive otherwise). Prefer descriptive names like report.md over throwaways like test1 or aaa.
Sync and backups: The assistant reads files in the current workspace on local disk. If material lives only in a web drive and is not synced locally, it cannot be opened like a normal folder. If you use Git for Workspace, do not push folders that contain secrets, tokens, or private config to public repos. With cloud sync, watch for conflicts and permissions so you do not overwrite or leak data.
Once these habits stick, finding and maintaining files gets easier. The structure does not need to be perfect on day one; some order beats a flat pile.
Visual Studio Code is a tool for working with files; the files stay on your disk. A clear tree saves a lot of time later.
Open Your Workspace
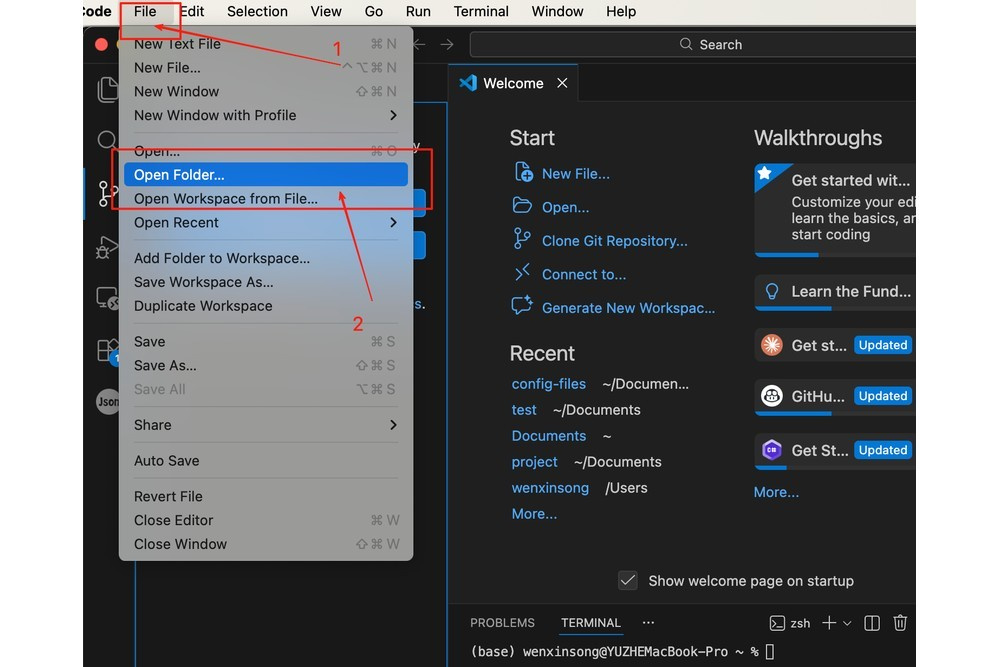
Choose File → Open Folder and select your workspace or project root.
In the Explorer you can expand or collapse folders and use the toolbar to create files, create folders, and refresh.

Create Folders and Files
New Folder
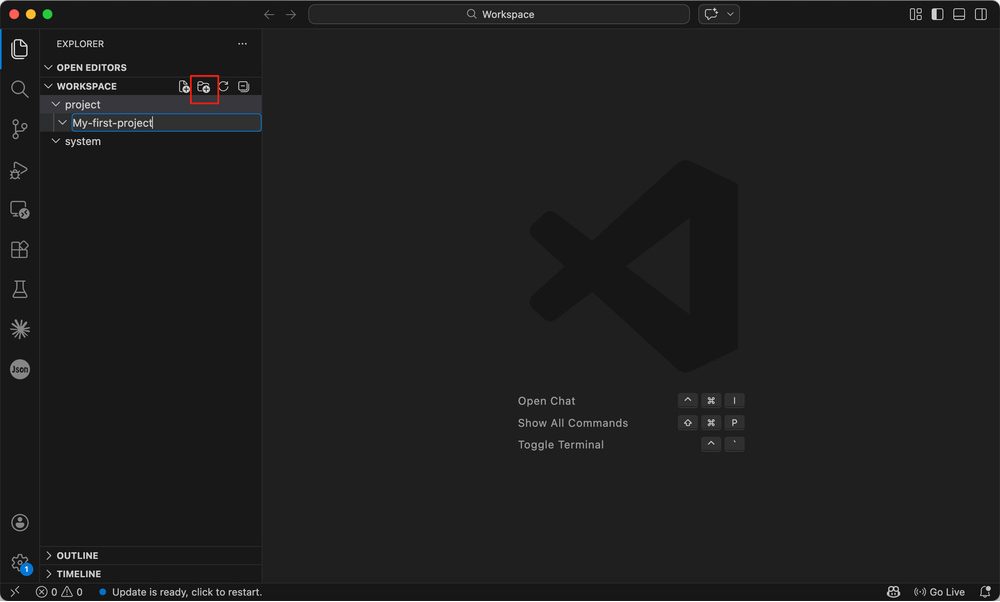
Select project (or whichever folder holds projects), use New Folder on the toolbar, and create a subfolder for your first project.
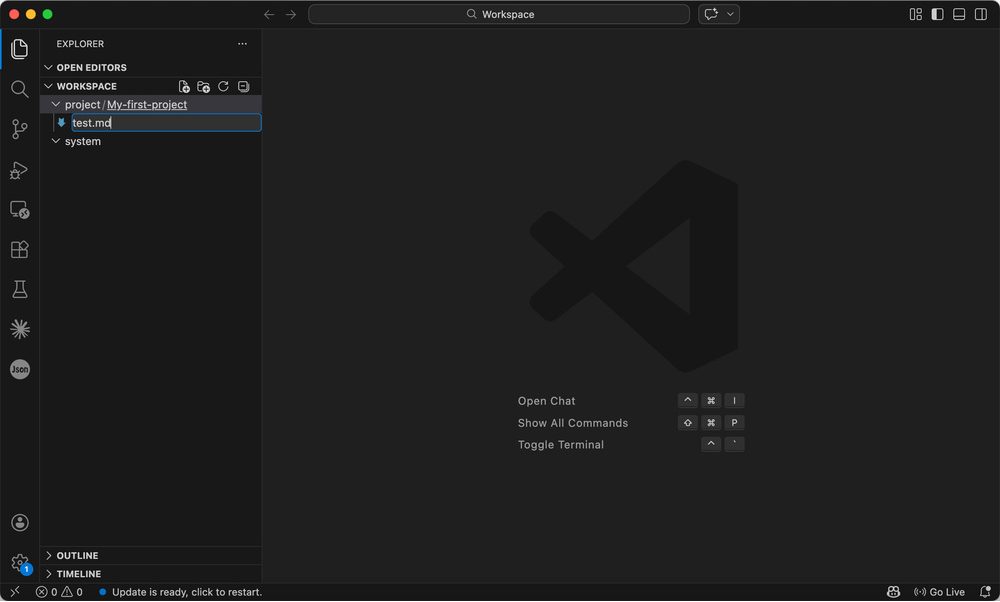
New File
Use New File in the target folder the same way.
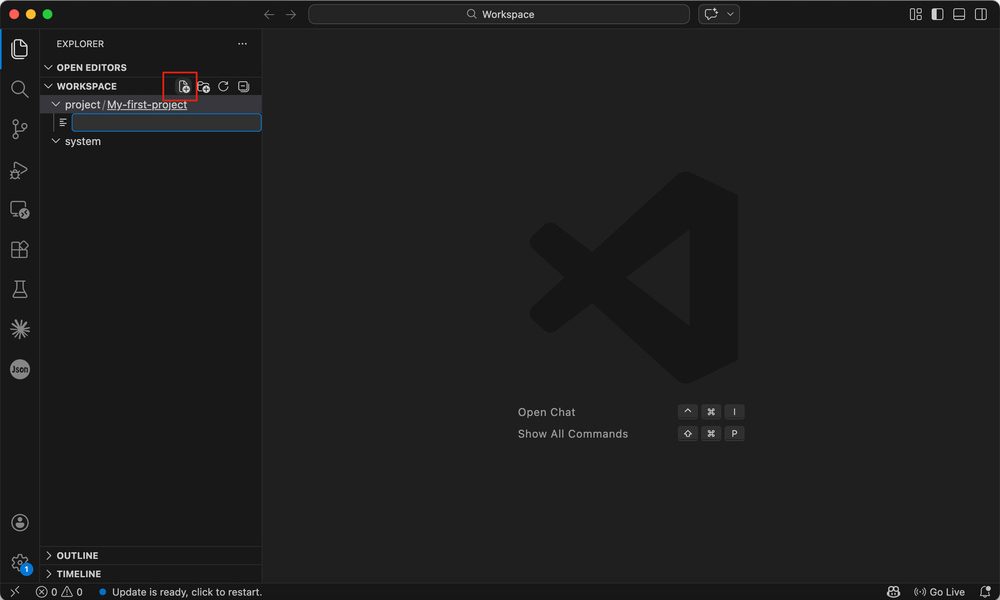
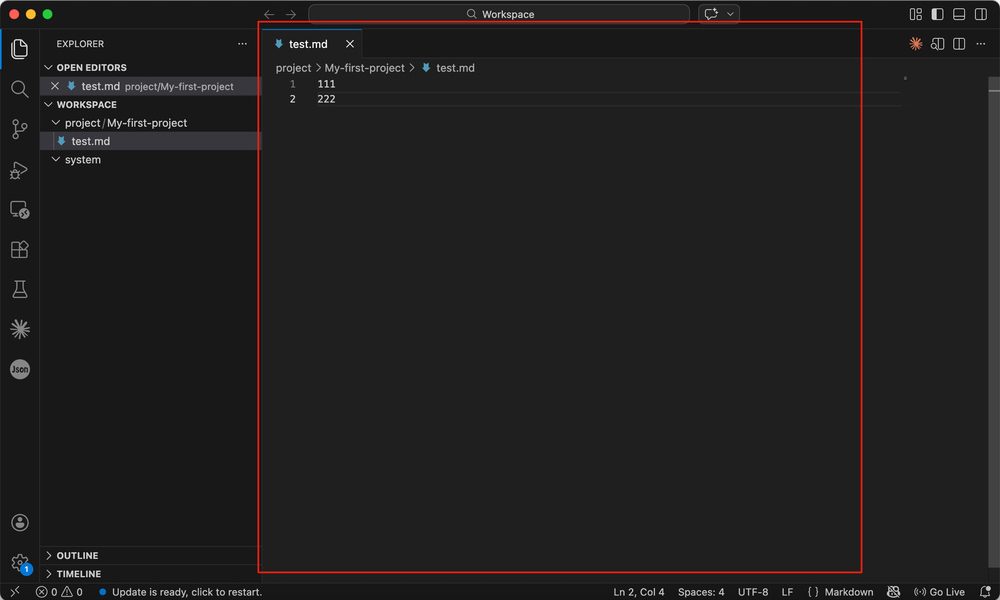
New files start empty; when saving, use an extension such as test.md.
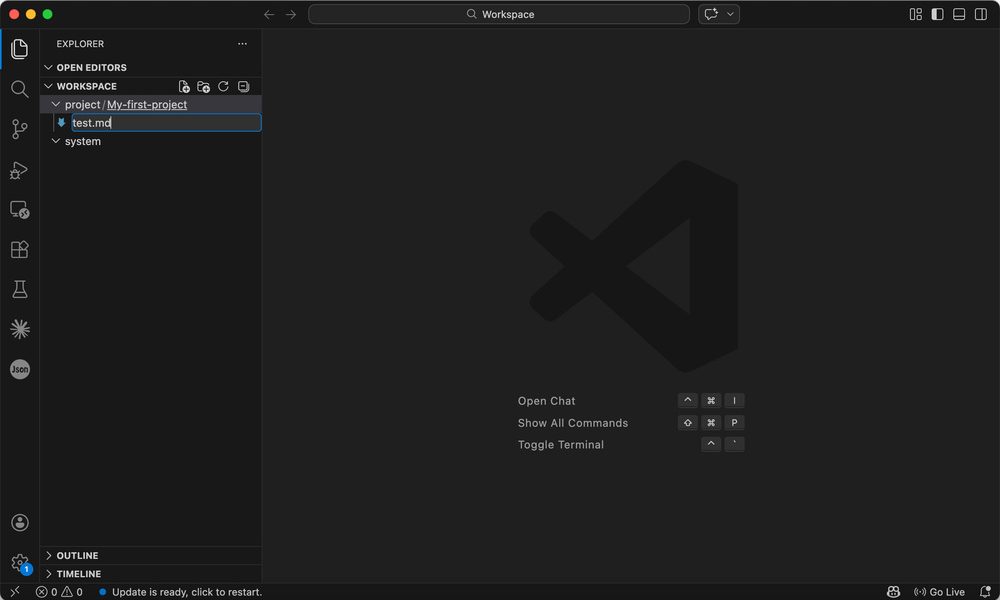
Click the file in the sidebar to open it.

Rename and Delete
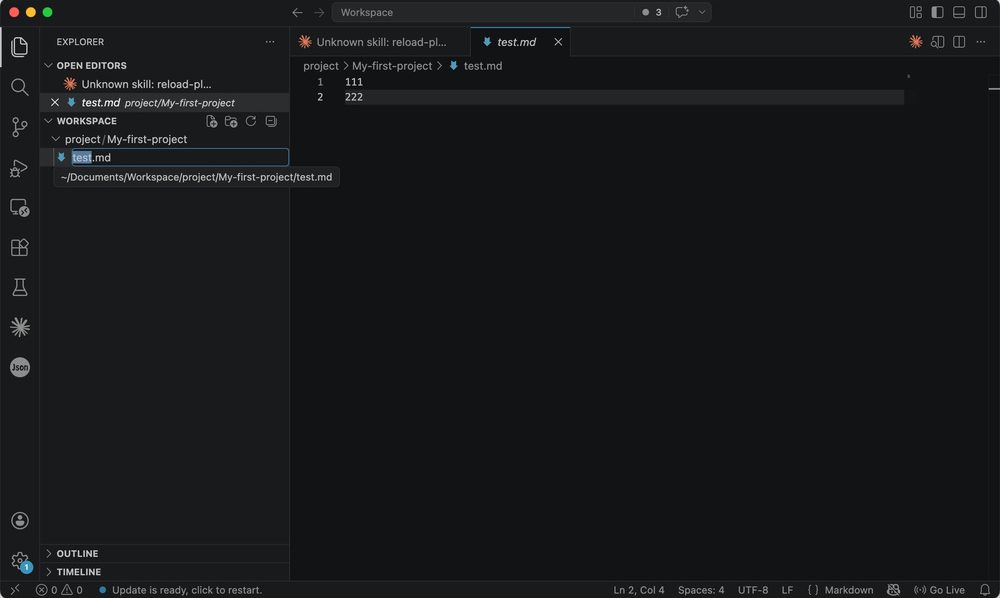
Rename a File
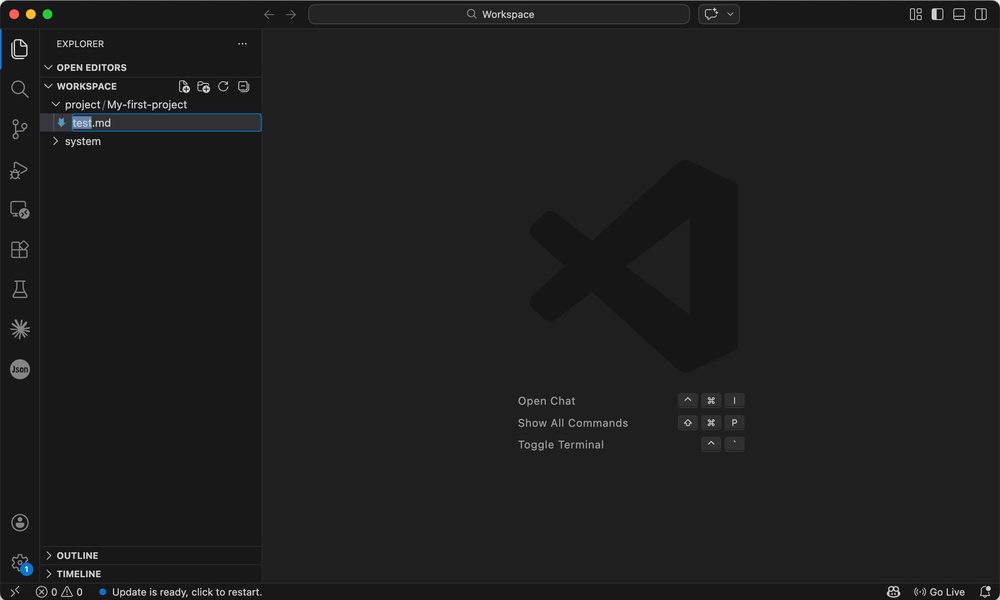
Right-click the file → Rename, type the new name.
On Mac you can also select the file and press Enter to rename quickly.
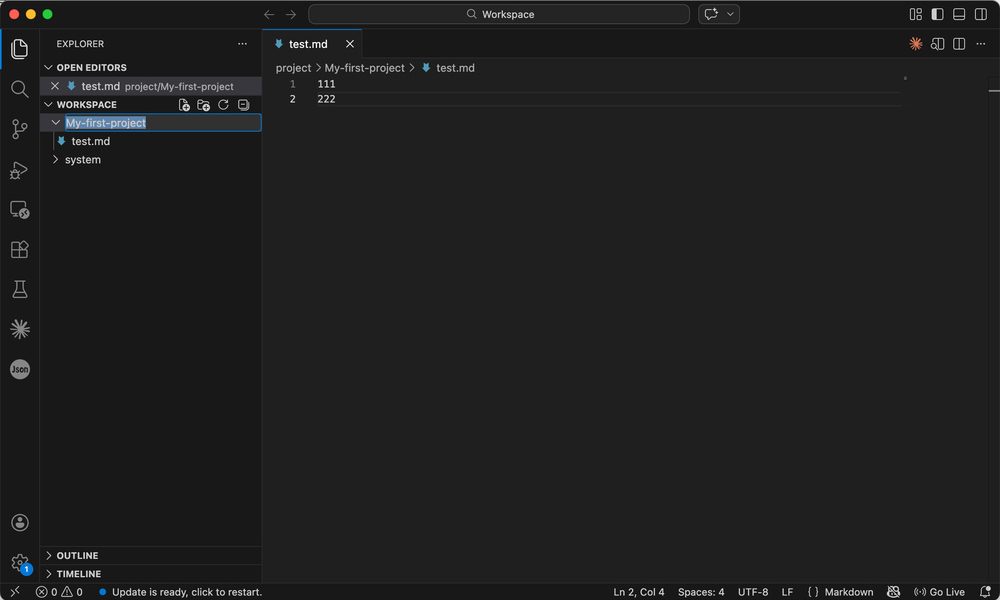
Rename a Folder
Same as files: Rename from the context menu, or select and press Enter.

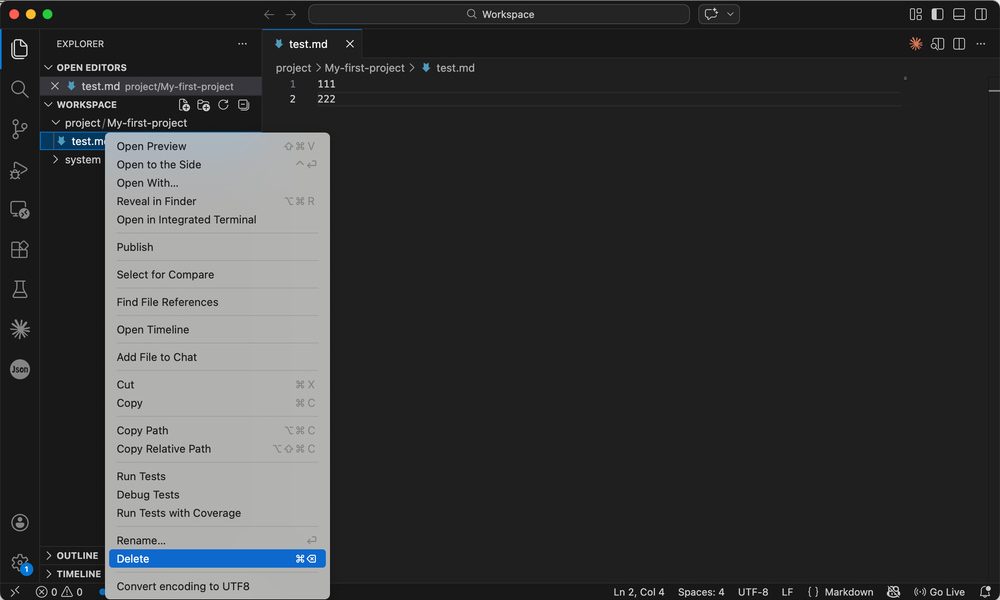
Delete Files or Folders
Right-click → Delete.
Search
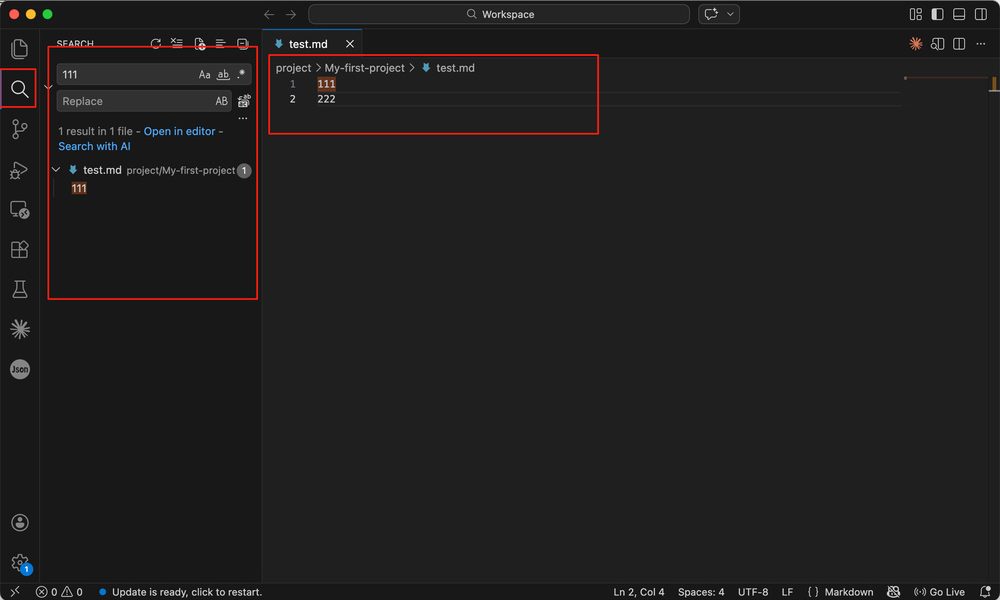
Search runs across the workspace (including subfolders), highlights matches, and lets you jump from results.

Extensions
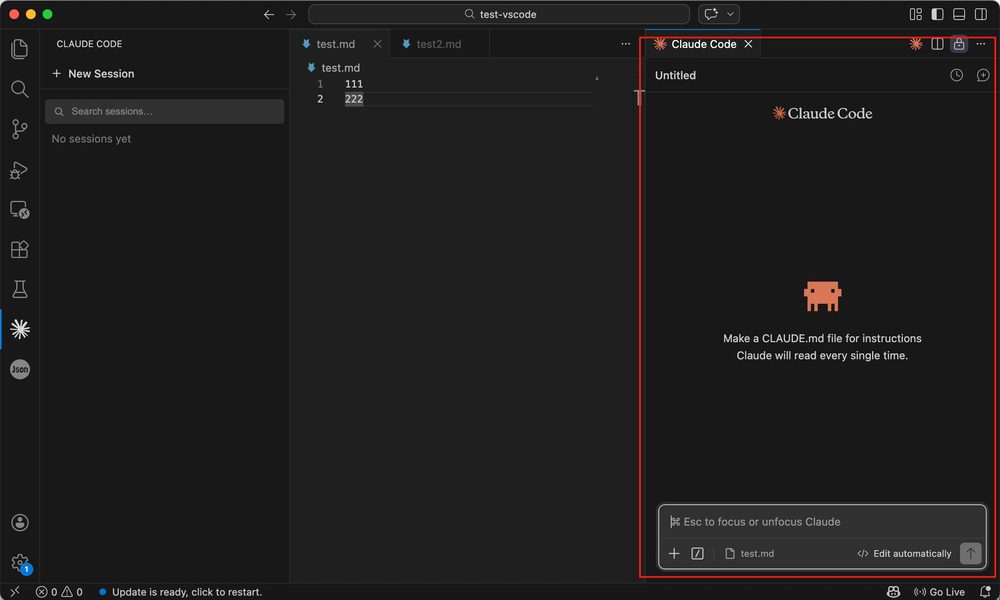
The Extensions view is the marketplace. Search for claude, install Claude Code for Visual Studio Code.
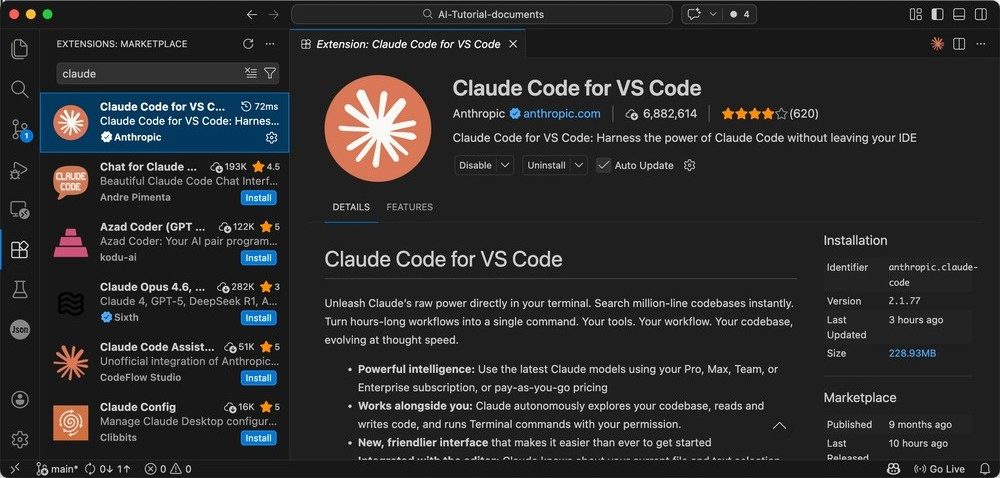
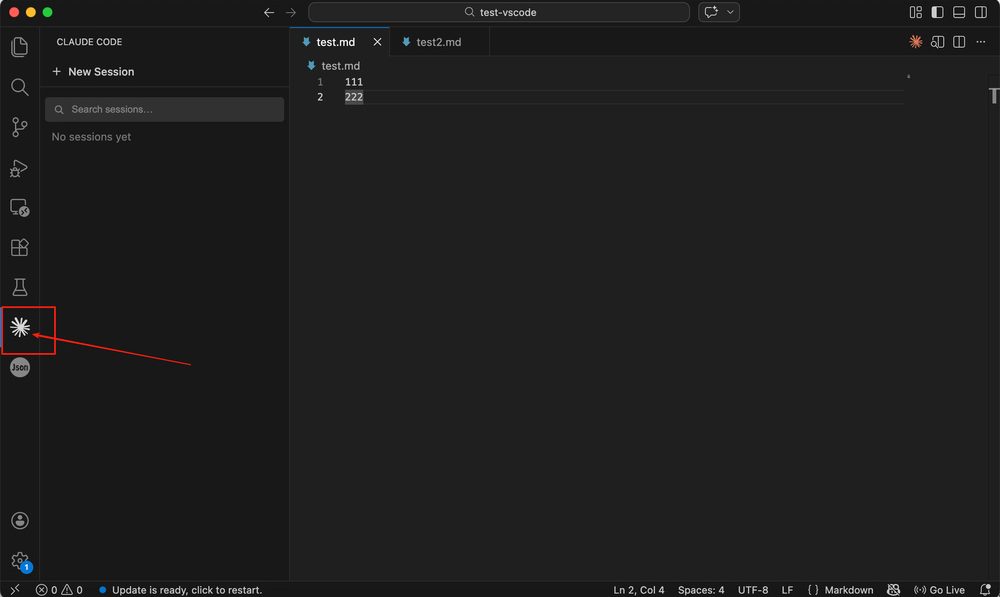
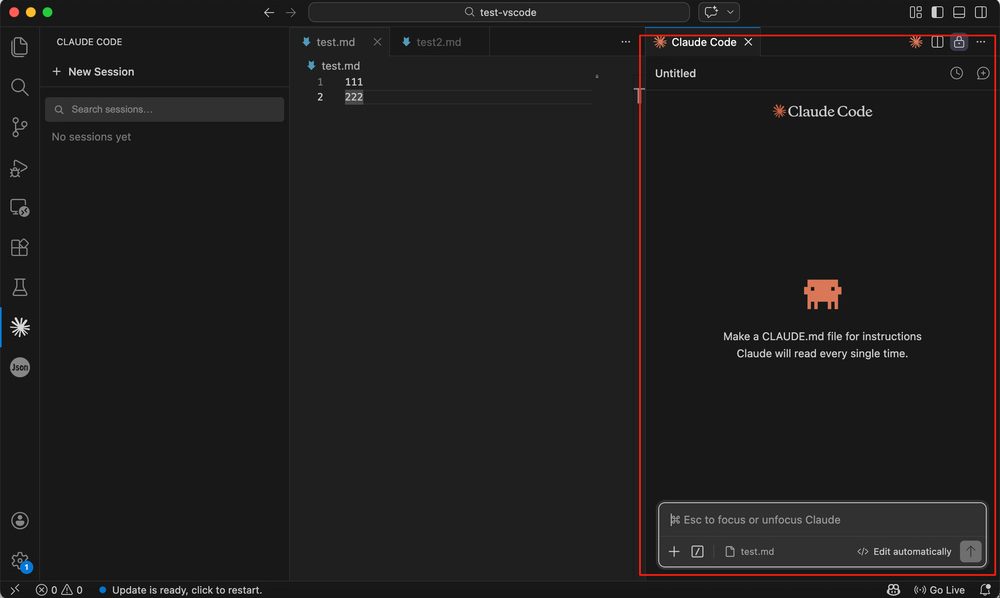
After install, a Claude icon appears on the activity bar; open it for the Claude Code panel.
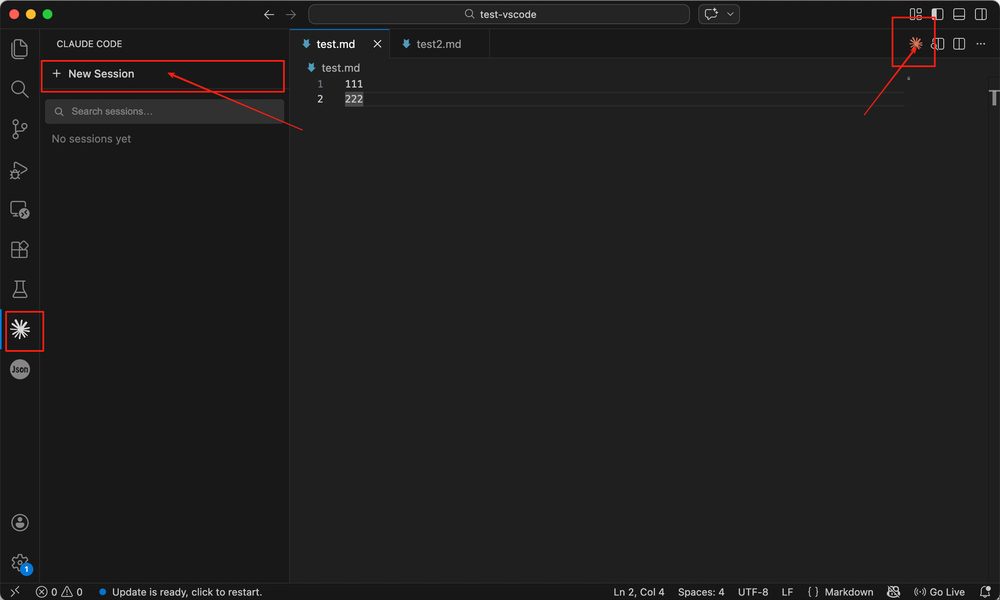
To start a new session, use New Session in the panel or the Claude Code icon in the editor title bar, either works.
Part 3: Important Hidden Files and Folders
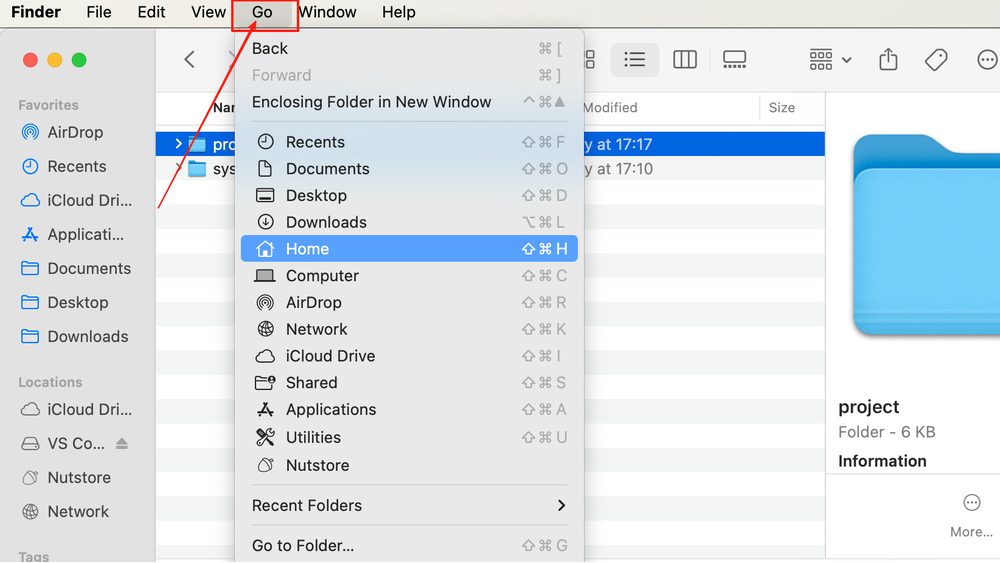
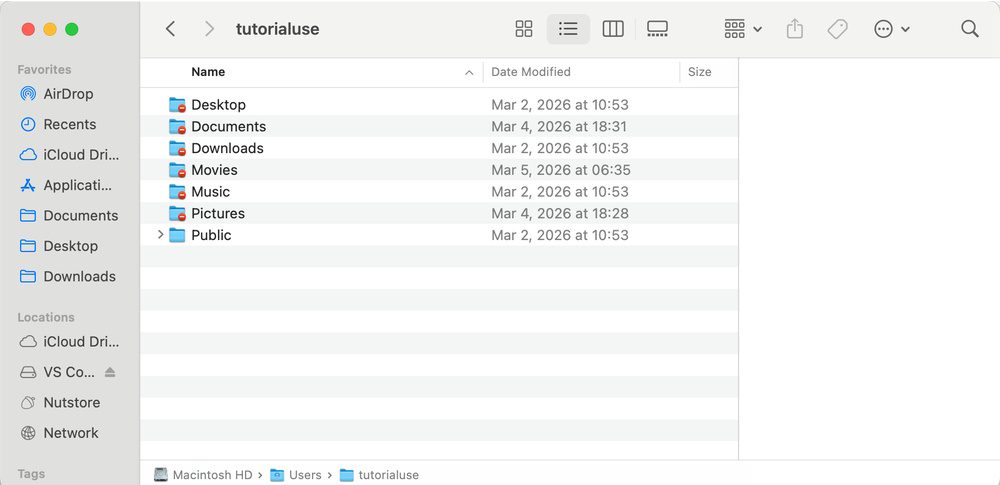
Besides obvious files, hidden folders and config files often decide whether the environment stays stable. Knowing what they do speeds up troubleshooting. Choose Go → Home to open your home folder.
By default Finder shows common folders like Desktop, Documents, Downloads.
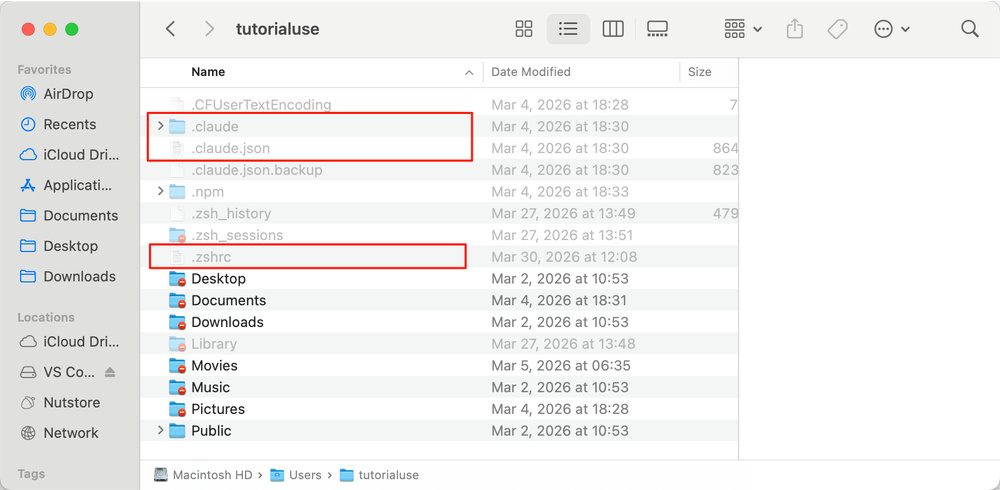
Press Command + Shift + . to show hidden items. Coding assistants often store login state, preferences, shared instructions, and external tool wiring under hidden folders in your home directory; manifest-style files may register capabilities. Shell startup files or project .env files often hold aliases or secret references. Treat these as sensitive, do not post screenshots publicly or commit them to open repos.
Part 4: CLI Claude Code (Optional)
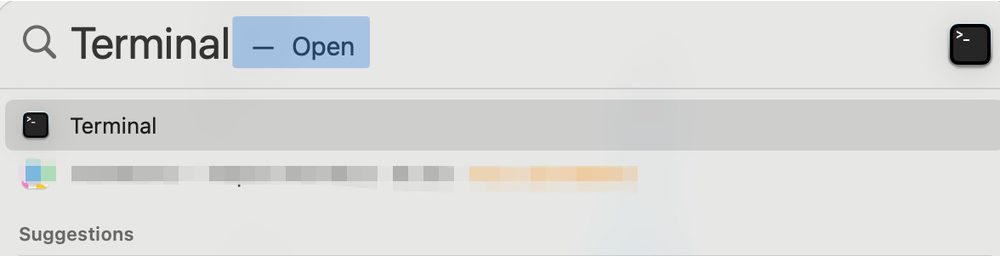
Press Command + Space, search for Terminal, and open it.
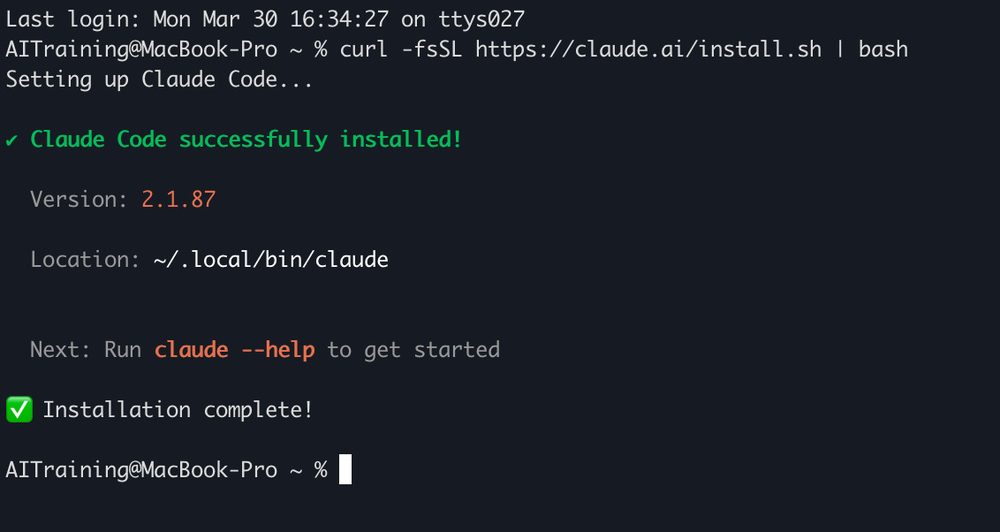
Run the command below and press Enter. When the script finishes, the CLI coding assistant is installed (it can coexist with the Visual Studio Code extension, use whichever fits).
curl -fsSL https://claude.ai/install.sh | bash

Set Up Your AI Workspace (Windows)
Chatbot versus Agent
Chatting with AI in the browser is quick, but when you need to change projects on disk, batch-edit files, and keep the assistant aligned with what is in the current folder, you want a local-folder-first workflow: files live on disk, and the editor’s assistant reads and writes them by path instead of endless copy-paste.
Web AI versus a Local AI Workspace: What’s the Difference?
AspectWeb chat AILocal workspace (Visual Studio Code + agent)Reading your projectUsually manual copy-paste or repeated uploadsOpen the folder; the agent reads/writes by pathBatch editsHard to change a whole tree reliably and reviewablySuited to multi-file refactors, renames, scaffolding**‘Project memory’Context often breaks when the session endsThe workspace is the boundary; instructions align with the treeRepeatable flowsDepends on you re-describing the environment each timeTerminal, Git, and extensions can be scripted and sharedLearning curve**LowSlightly higher, but pays off once set up
Visual Studio Code is a common entry point for this kind of workspace. After you install a coding-assistant extension, you can edit files and work with the assistant in one window and keep day-to-day writing and collaboration in one place.
What is Visual Studio Code? Why Visual Studio Code?
Visual Studio Code is a workspace for viewing, editing, and managing files on your computer, not where the files are actually stored. Think of the computer as a room: files sit in a filing cabinet. Visual Studio Code is more like a desk; when you open it, you lay out the files you need and work on them there. Edits, saves, and deletes on the desk change the originals in the cabinet.
From that angle, Visual Studio Code bundles browsing, search, and editing so you hop between apps less. Extensions add capabilities, for example, the Claude coding assistant can run inside Visual Studio Code so coding and AI-assisted edits stay in one environment.
Part 1: Install Visual Studio Code
Install Visual Studio Code
Open the Visual Studio Code site https://code.visualstudio.com/ and download the installer.
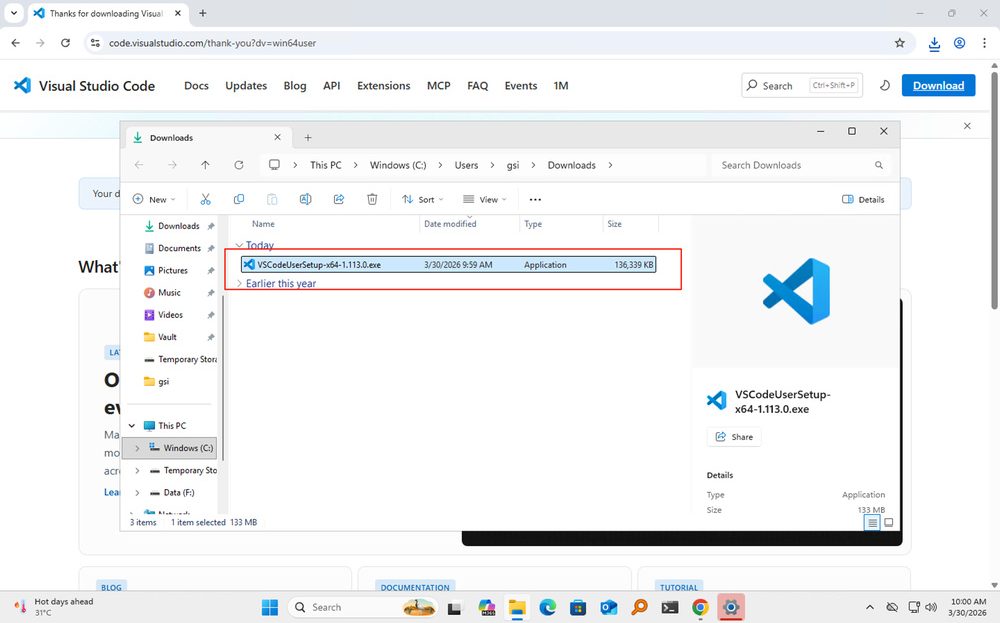
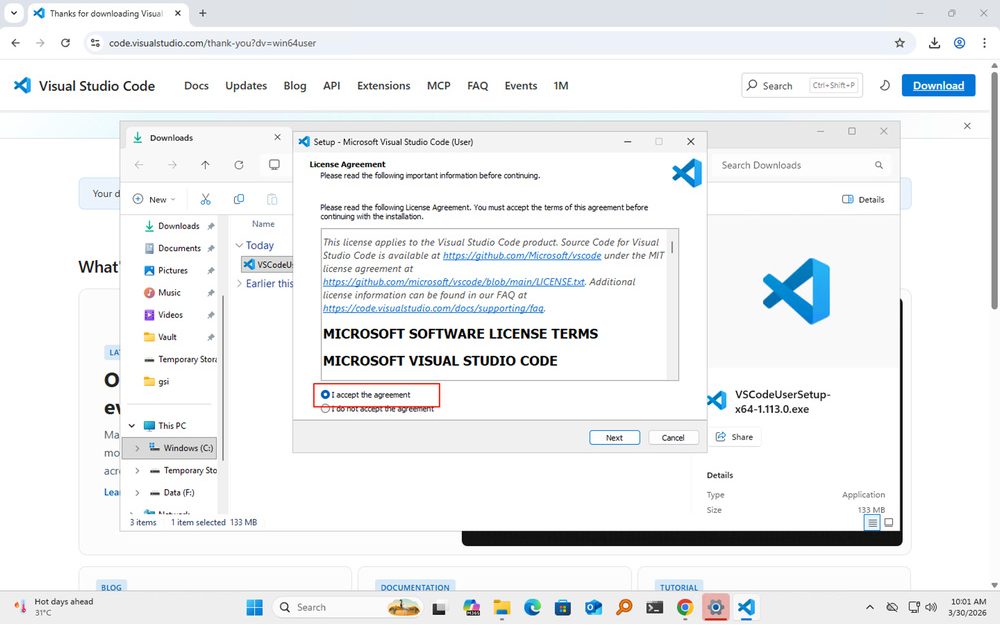
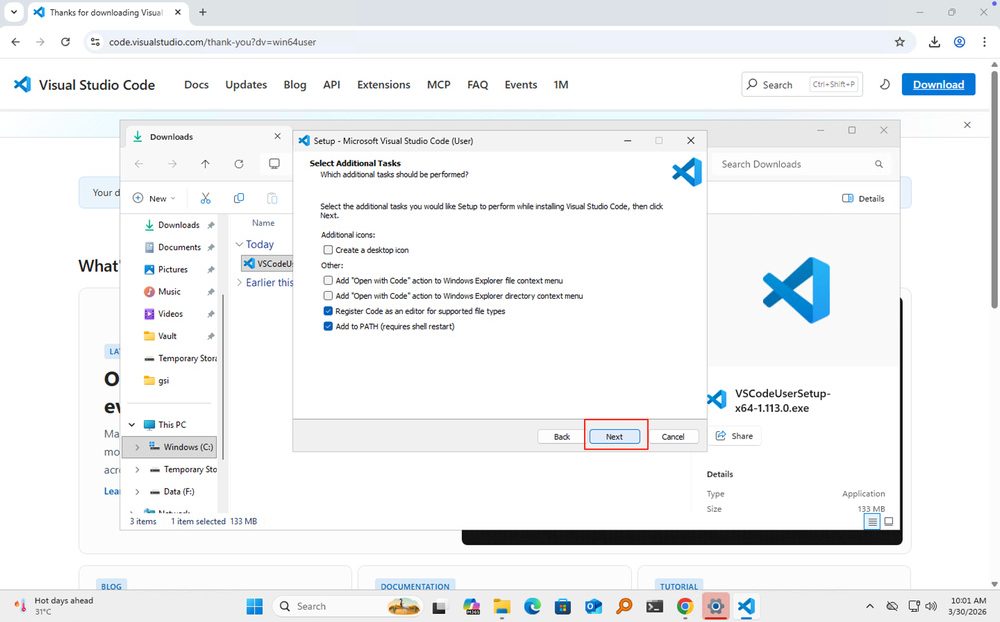
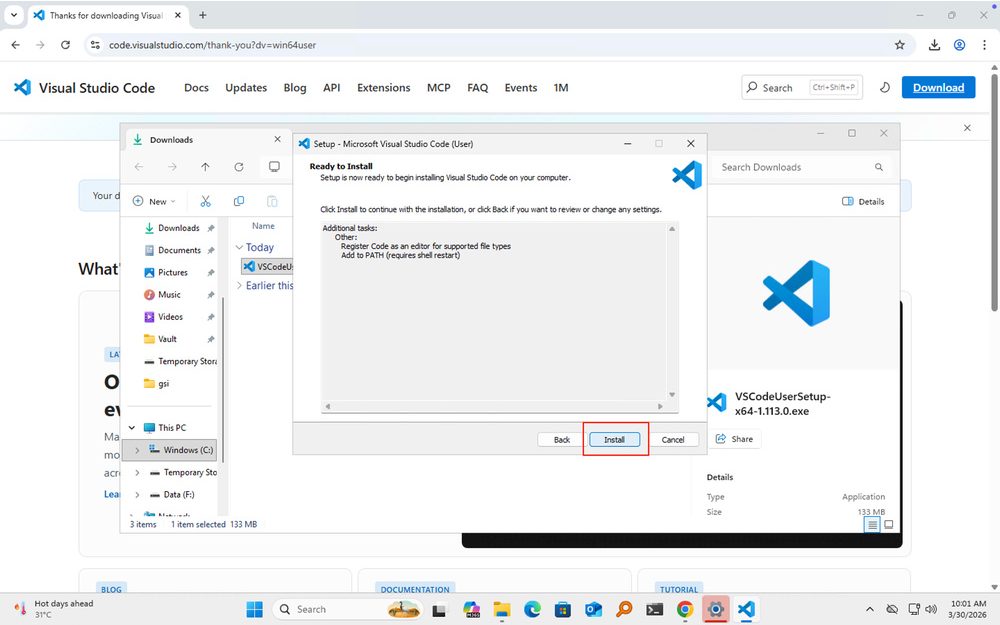
Double-click the installer and follow the wizard.
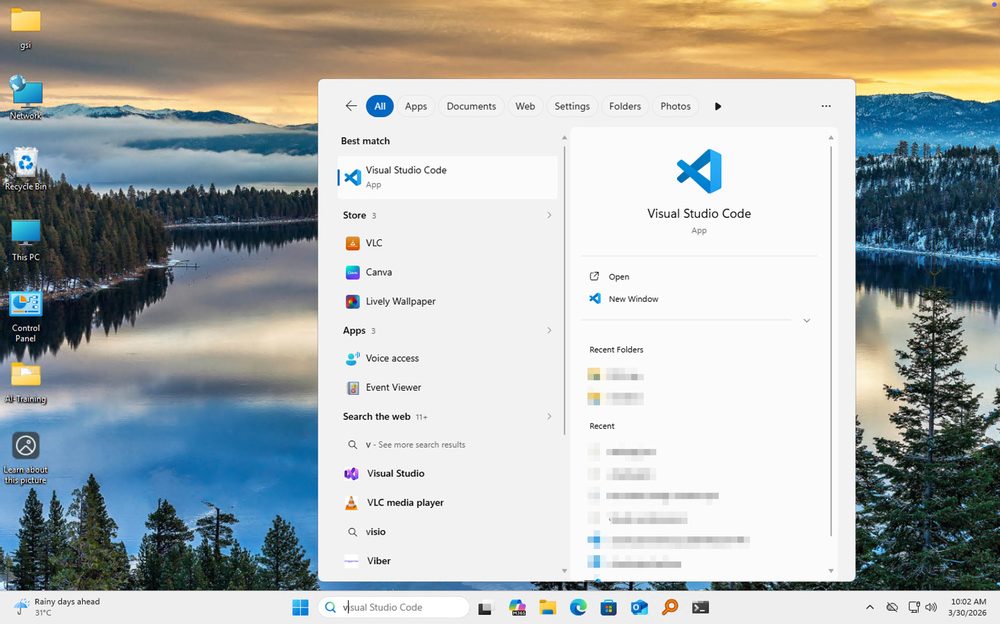
When installation finishes, press Win, search for Visual Studio Code or Code, and open it.
Part 2: Manage Your Workspace on Disk
Basic File Habits
Many beginners struggle not with menus but with messy trees, forgotten paths, and mixing different projects. A few habits prevent most of that.
Carve out a dedicated work area, for example a top folder called Workspace with two children: global rules versus concrete projects. Use system for conventions every project should follow (style guides, task workflows), a long-lived “briefing” for your assistant. Use project for separate tasks, each in its own subfolder, with notes or config as needed. The tree might look like this; names are up to you as long as the layout is obvious.
Workspace/ ├── system/ ├── project/ │ ├── subproject1/ │ ├── subproject2/ │ └── subproject3/
Stick to one folder per project so unrelated tasks do not share a directory level (search and cleanup get expensive otherwise). Prefer descriptive names like report.md over throwaways like test1 or aaa.
Sync and backups: The assistant reads files in the current workspace on local disk. If material lives only in a web drive and is not synced locally, it cannot be opened like a normal folder. If you use Git for Workspace, do not push folders that contain secrets, tokens, or private config to public repos. With cloud sync, watch for conflicts and permissions so you do not overwrite or leak data.
Once these habits stick, finding and maintaining files gets easier. The structure does not need to be perfect on day one; some order beats a flat pile.
Visual Studio Code is a tool for working with files; the files stay on your disk. A clear tree saves a lot of time later.
Open Your Workspace
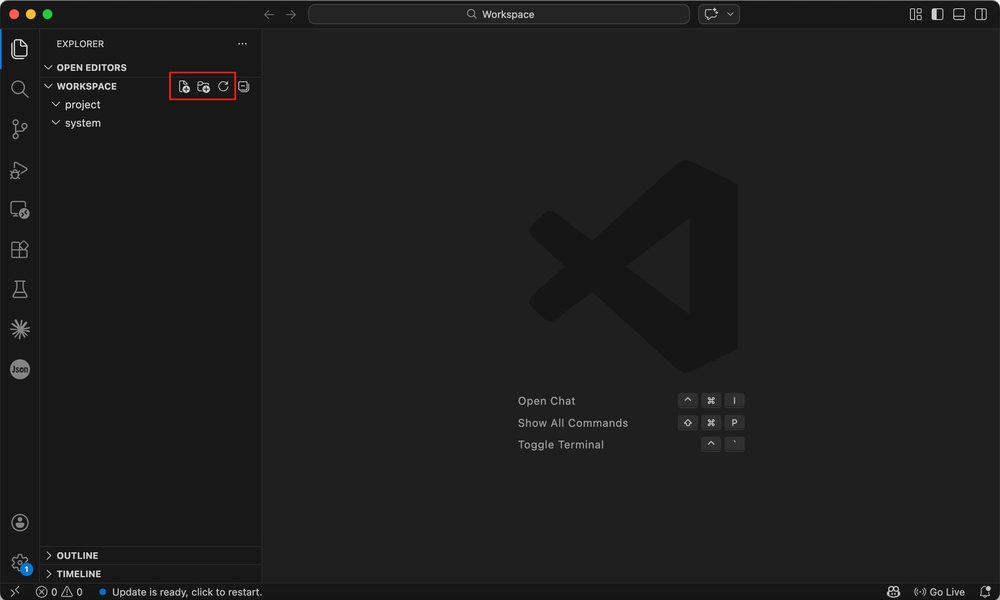
Choose File → Open Folder and select your workspace or project root.

In the Explorer you can expand or collapse folders and use the toolbar to create files, create folders, and refresh.
Create Folders and Files
New Folder
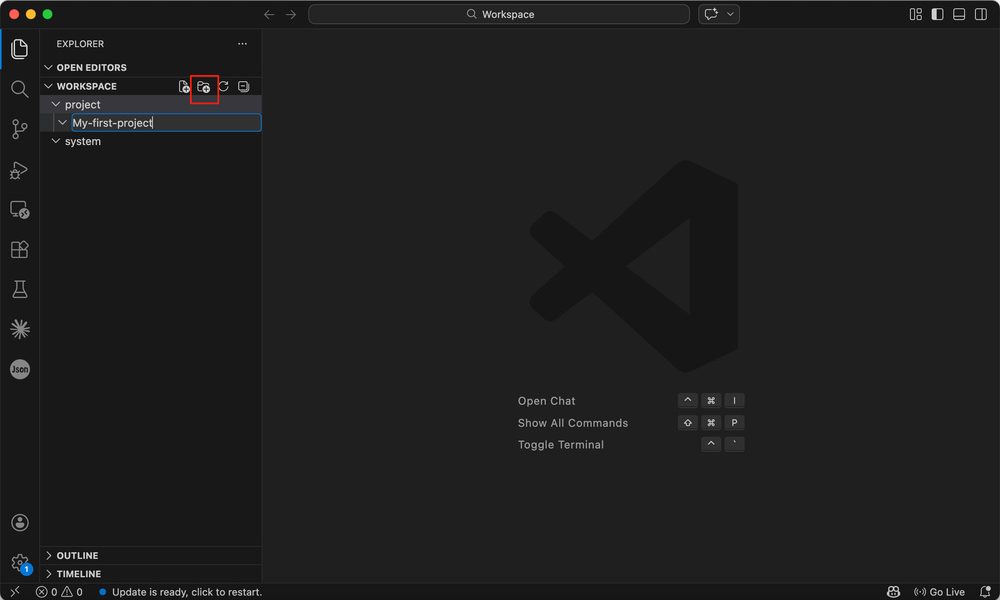
Select project (or whichever folder holds projects), use New Folder on the toolbar, and create a subfolder for your first project.
New File
Use New File in the target folder the same way.

New files start empty; when saving, use an extension such as test.md.
Click the file in the sidebar to open it.
Rename and Delete
Rename a File
Right-click → Rename, type the new name. On Windows you can also select the file and press F2.
If Rename does not appear, make sure you are not in a read-only view, or use the rename entry from the context menu.
Rename a Folder
Same as files: Rename, or select and press F2.
Delete Files or Folders
Right-click → Delete.

Search
Search runs across the workspace (including subfolders), highlights matches, and lets you jump from results.
Extensions
The Extensions view is the marketplace. Search for claude, install Claude Code for Visual Studio Code.

After install, a Claude icon appears on the activity bar; open it for the Claude Code panel.

To start a new session, use New Session in the panel or the Claude Code icon in the editor title bar.

Part 3: Important Hidden Files and Folders
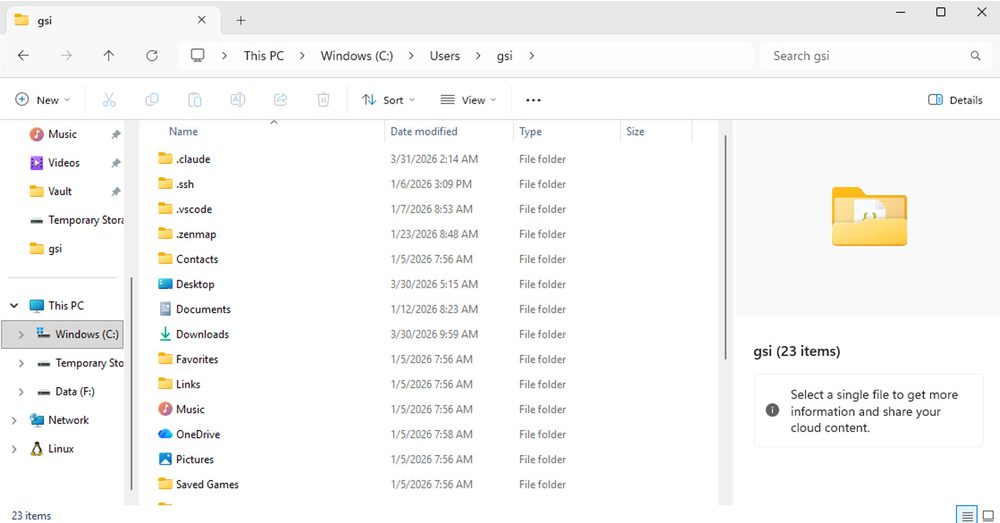
Besides obvious files, hidden folders and config files often decide whether the environment stays stable. Go to C:\Users\ and open the folder that matches your Windows sign-in name, your profile root.

Besides Desktop, Documents, Downloads, you may see config entries related to dev tools. Coding assistants often store login state, preferences, shared instructions, and external tool wiring under hidden folders; manifest-style files may register capabilities. Environment files may hold secret references. Treat these as sensitive, do not post screenshots publicly or commit them to open repos.
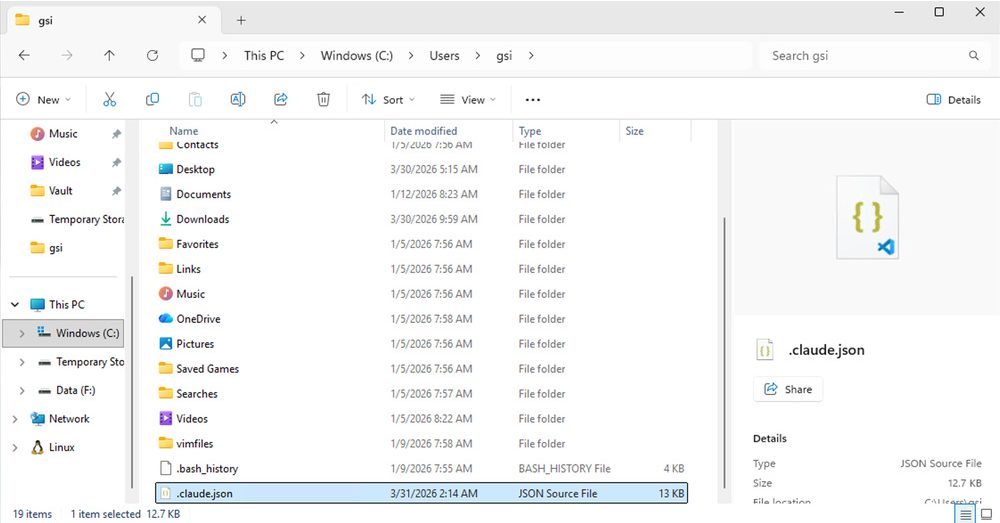
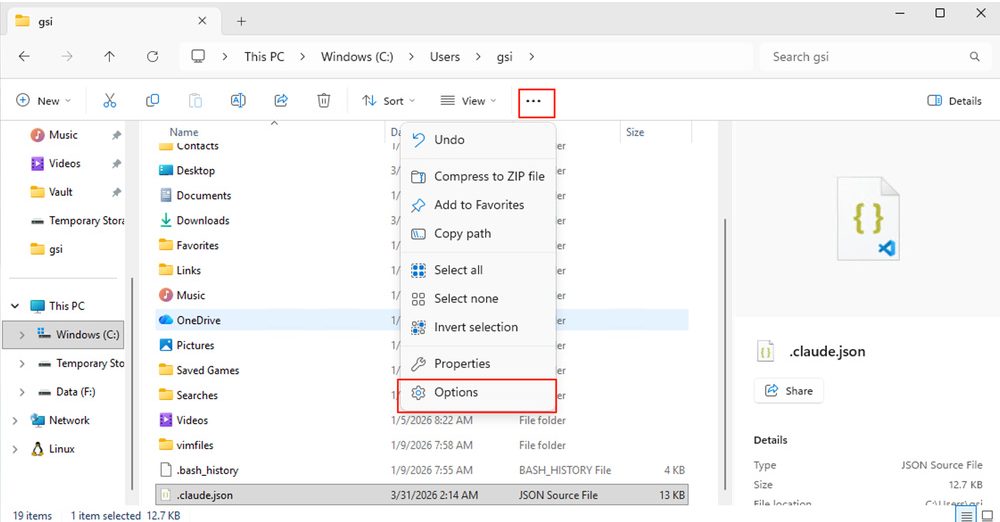
To show hidden files in File Explorer: … (More) → Options.
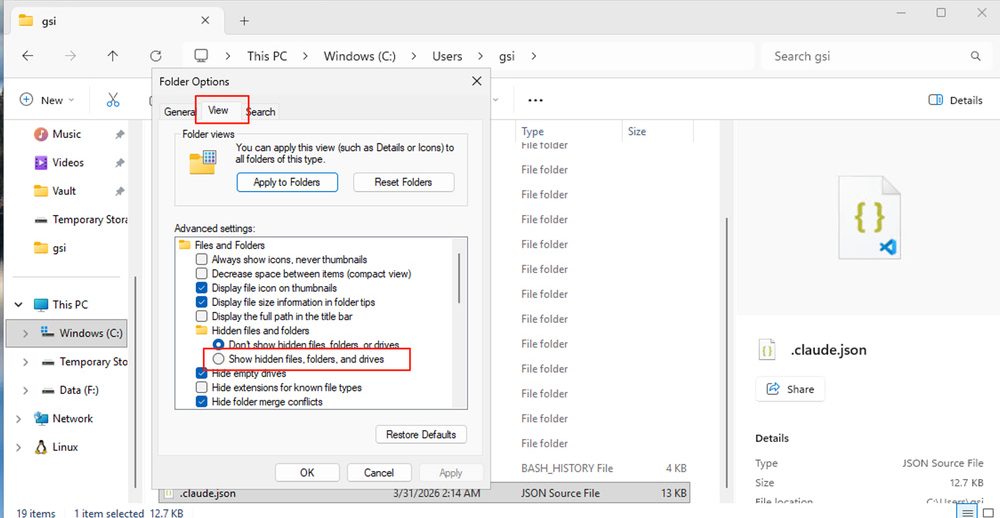
Open the View tab, under Hidden files and folders choose Show hidden files, folders, and drives.
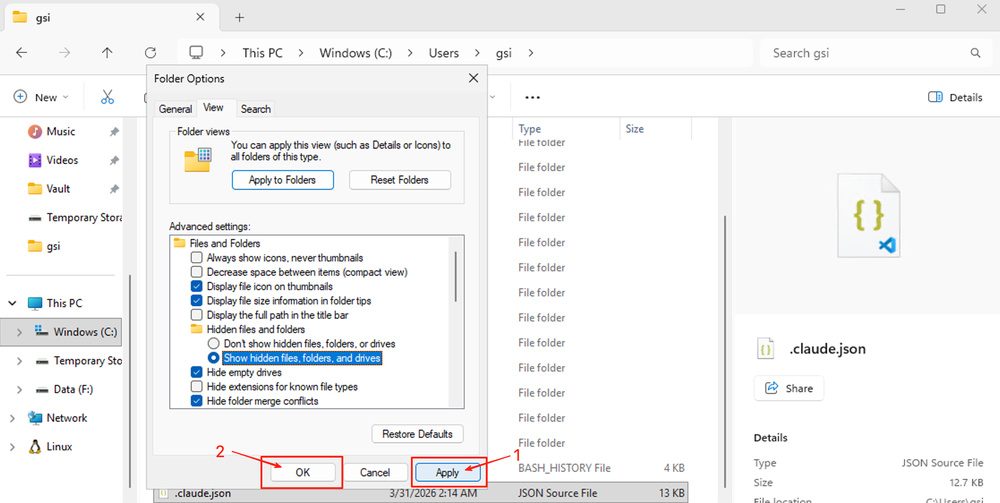
Click Apply and OK to save; the profile folder will list hidden items too.
Part 4: CLI Claude Code (Optional)
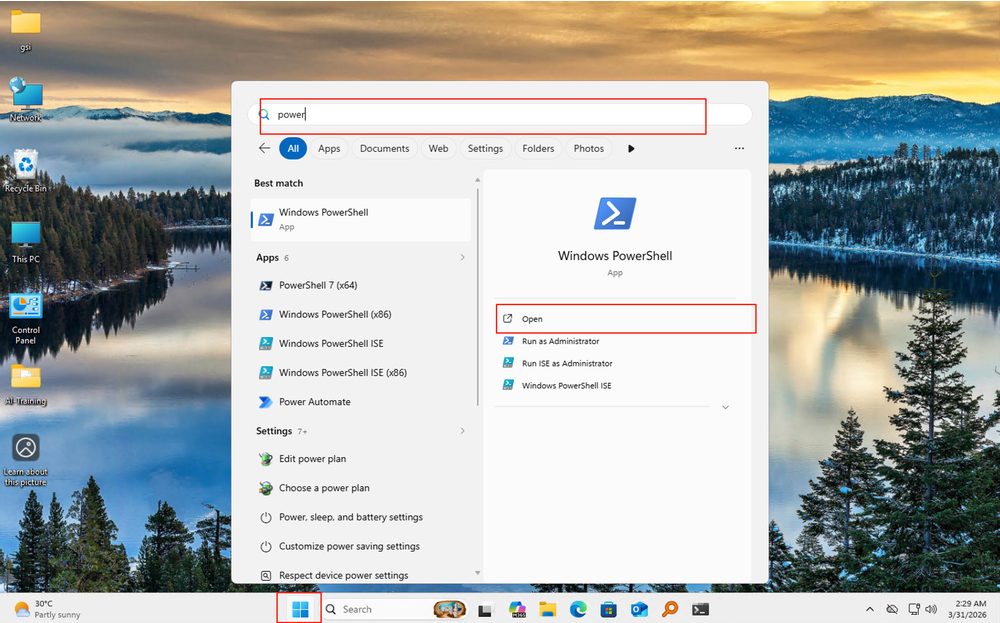
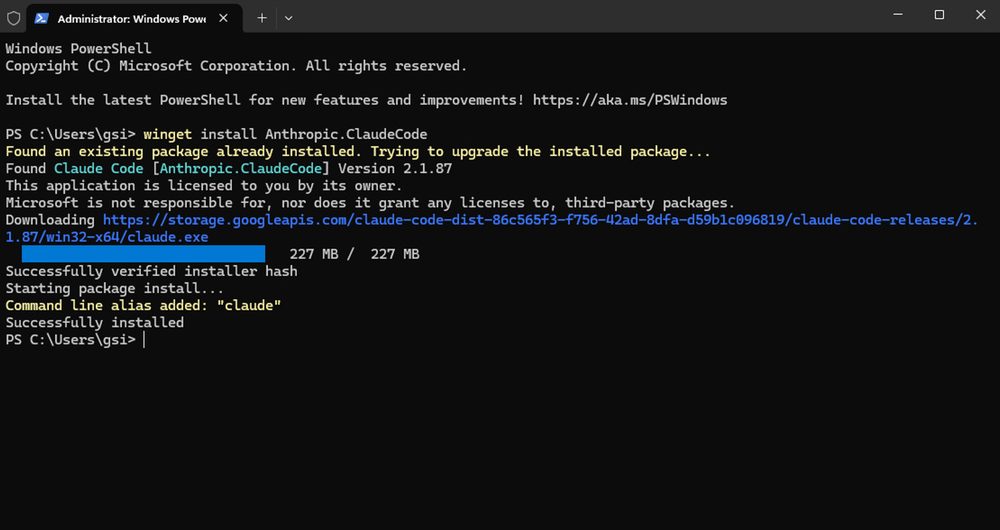
Press Win, search for PowerShell, and open it (use Run as administrator if a component install needs elevation).
Run the command below and press Enter. When winget finishes, the CLI coding assistant is installed (it can coexist with the Visual Studio Code extension).
winget install Anthropic.ClaudeCode

From | Tricontinental: Institute for Social Research via this RSS feed